Click ‘Download ZIP’ under ‘Raspberry Pi OS (32-bit) with desktop and recommended software’.
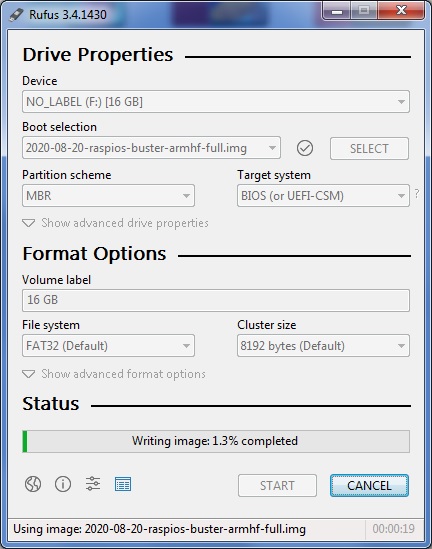
Next, download a Live USB utility like Rufus to make the SD card bootable for the Raspberry Pi. After installation select your SD card under ‘Device’ and the Raspberry Pi OS image under ‘Boot selection’ and click ‘START’.
From the file explorer and navigate to the root of the SD card containing the Raspberry Pi OS image, right click and create a new text document. Add the following lines in the file replacing ‘yourHiddenSSID’ with the SSID of your wi-fi home network and ‘Your_Wireless_network_password’ with the password.
After installation, click on ‘Start’ to scan your network, after a while the IP address of your Raspberry Pi should appear.
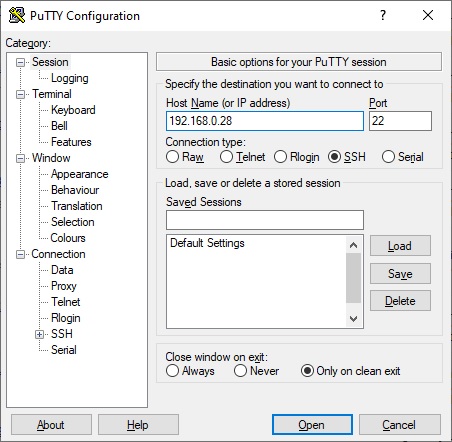
Next we need to connect to the Raspberry Pi from the computer. For this we will use ‘PuTTY’, click on the following link to download the software. https://www.putty.org/
When the download is finished, launch PuTTY, enter the IP address of the Raspberry Pi under ‘Host Name (or IP address)’, select SSH and click ‘Open’.
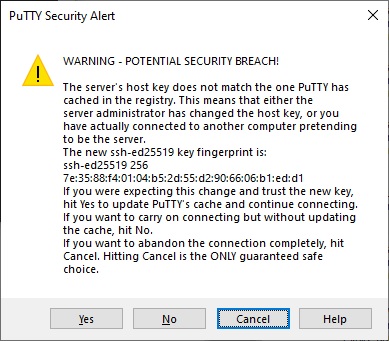
When the warning message appears, click ‘Yes’.
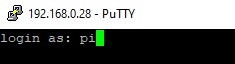
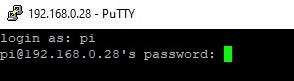
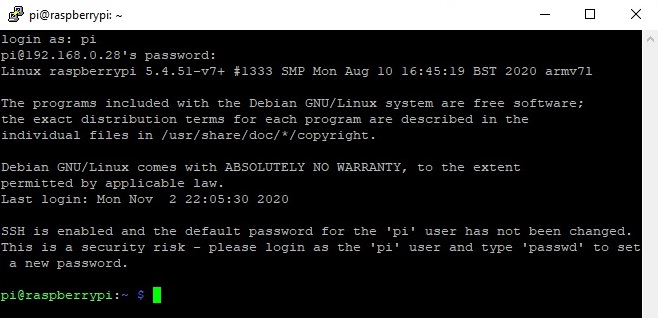
You are now connect to the Raspberry Pi through SSH. Next we need to enter the default login credentials. Type ‘pi’ as the login then hit Enter and ‘raspberry for the password and hit Enter.
When you have successfully logged-in, the following prompt will appear.
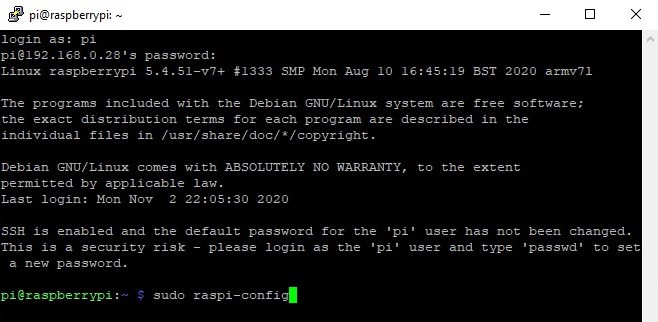
Next type:
sudo raspi-config and hit Enter.
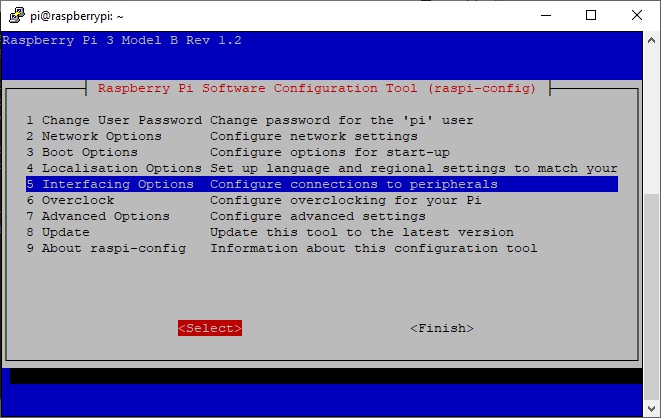
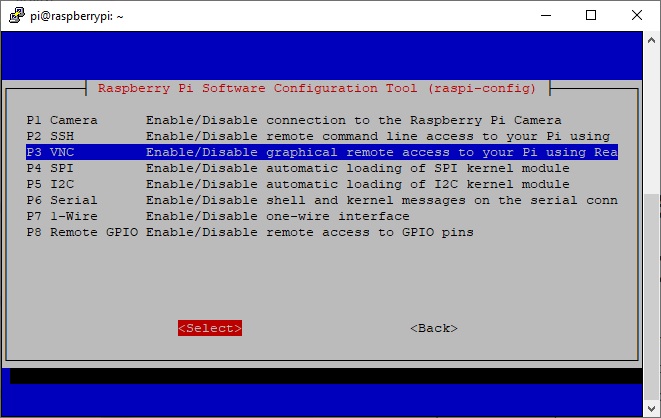
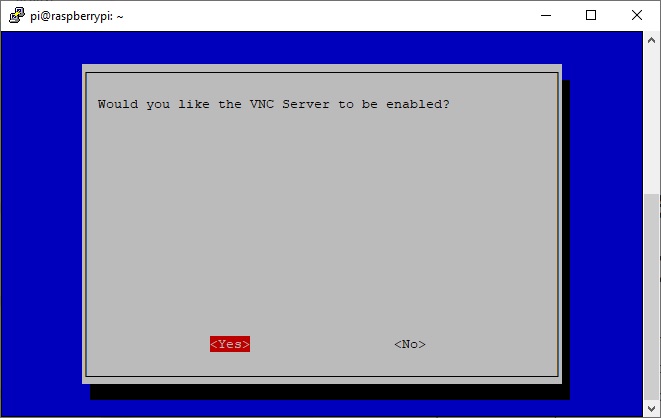
With the arrows of your keyboard select ‘Interfacing Options’, hit the ‘Tab’ key to choose ‘Select’ and hit Enter.
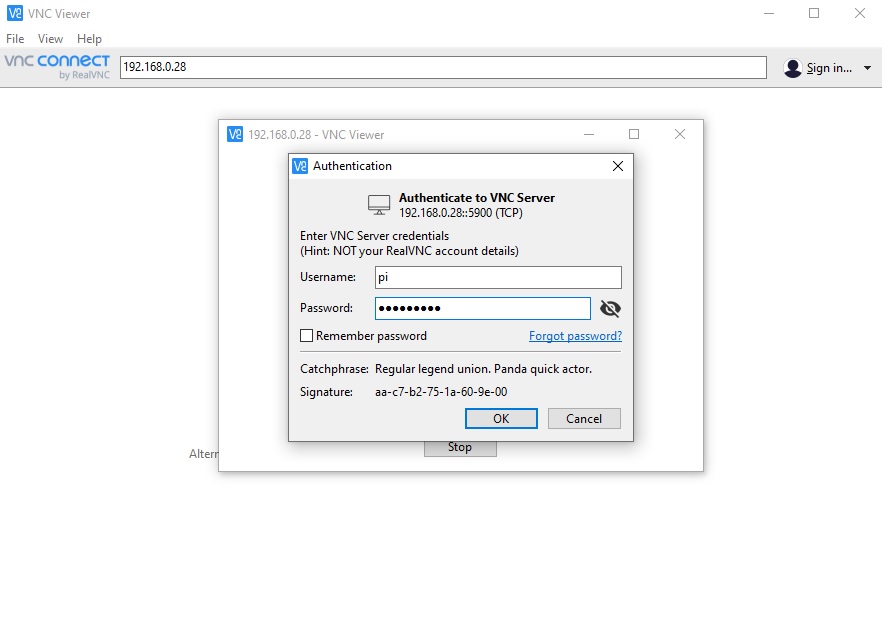
After installation, launch VNC Viewer and enter the IP address of the Raspberry Pi, hit Enter, the connection is starting, enter the Raspberry credentials when prompted, then click ‘OK’.
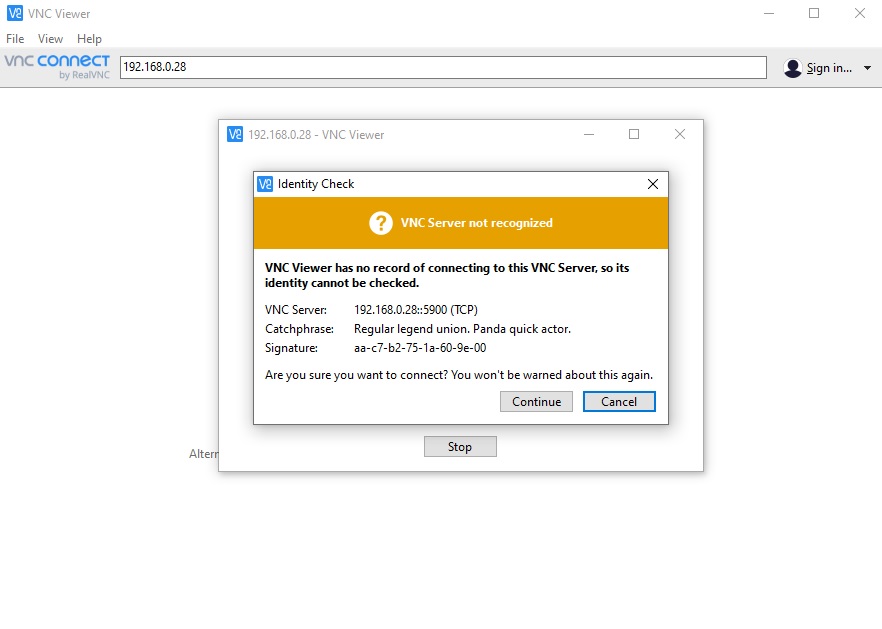
A warning message appears when the connecting for the first time. Select ‘Continue’ and hit Enter.
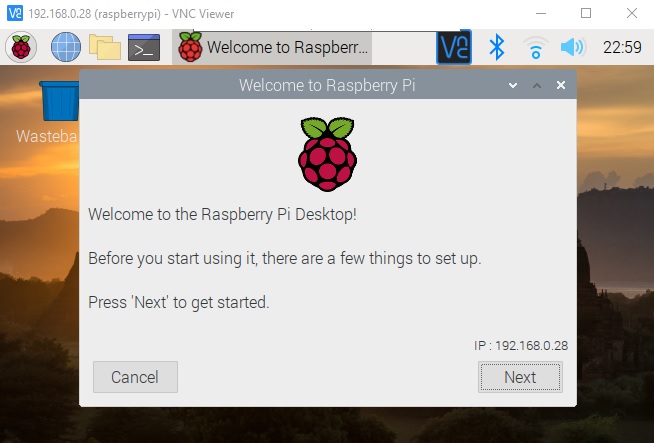
The connection is now established to the Raspberry Desktop.